2024-07-23
Ruby Installation in Windows Using RubyInstaller
Previously we talked about the Differences Between RVM, Rbenv and RubyInstaller and also I wrote a post about Creating A Windows Virtual Machine in AWS. For this post we’ll have to use these entries as the necessary context to install Ruby on a Windows environment using RubyInstaller for Windows. So, I’ll assume on this post that you have:
- - A Windows-based local machine, a virtual or physical one, where you can install Ruby via RubyInstaller
- - You have admin access to that machine
- - You know the differences between RVM, Rbenv and RubyInstaller, so you know about what we’re talking about here
Note: if you have Windows as your primary physical machine, and want to install Ruby there, you don’t need to install a virtual machine, so you can skip the first 2 steps of this blog post.
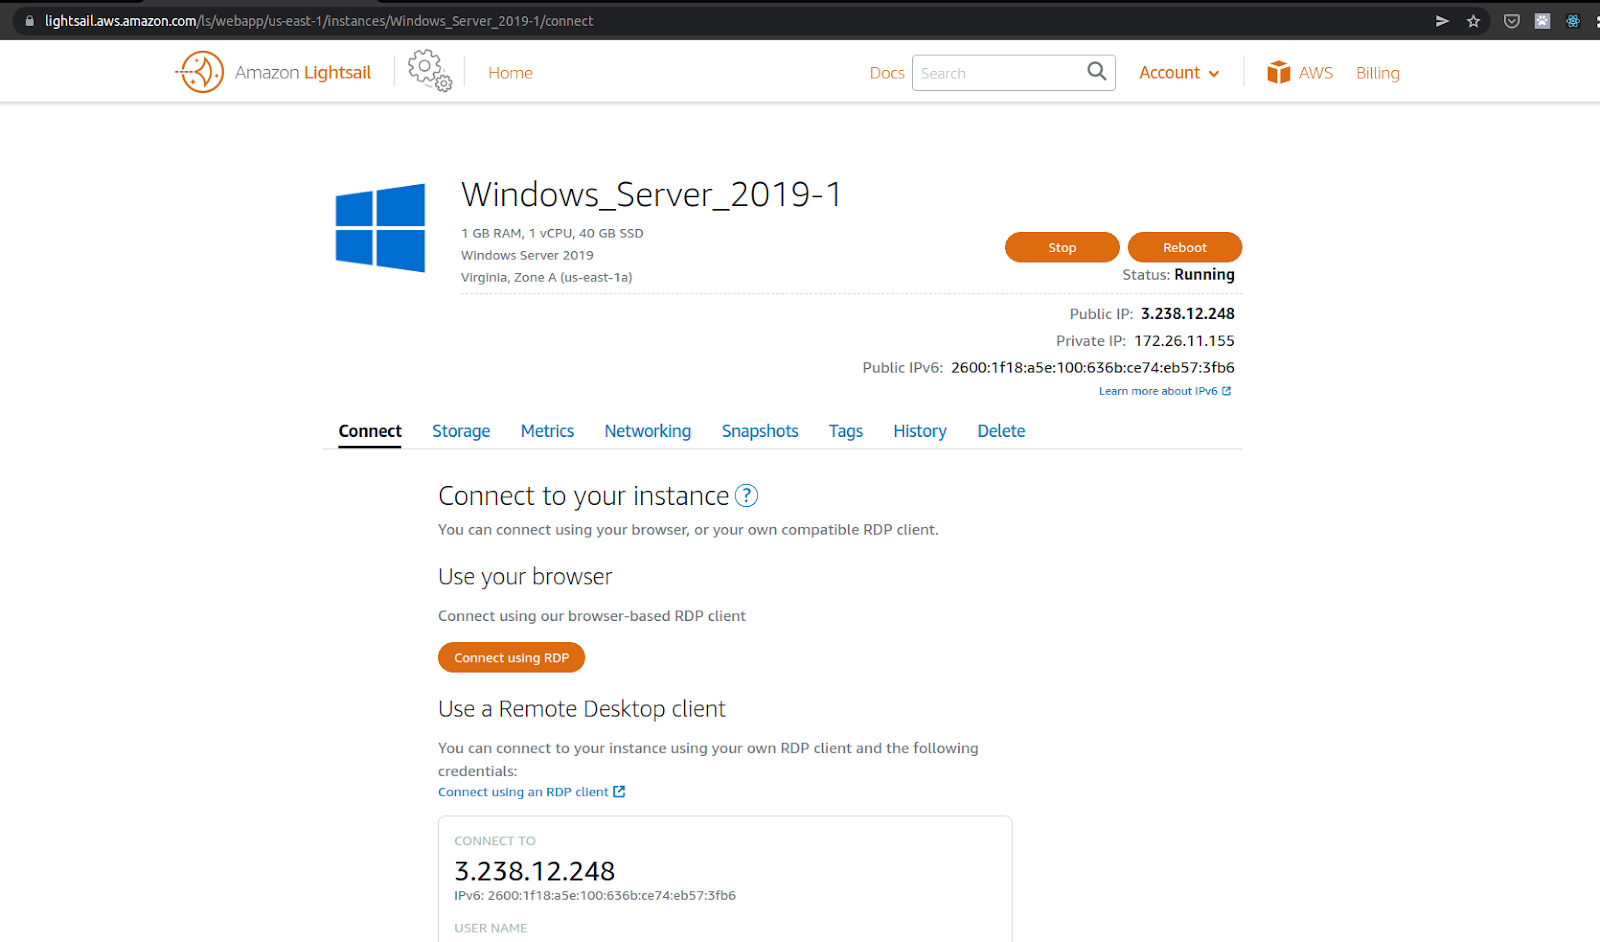
Step #1- Access to Amazon Lightsail Windows Instance
On our case we’ve created a Virtual Windows Machine using Amazon Lightsail, se we have to access to the Lightsail console over here: https://aws.amazon.com/lightsail/ then you’ll be redirected to a screen similar to this one
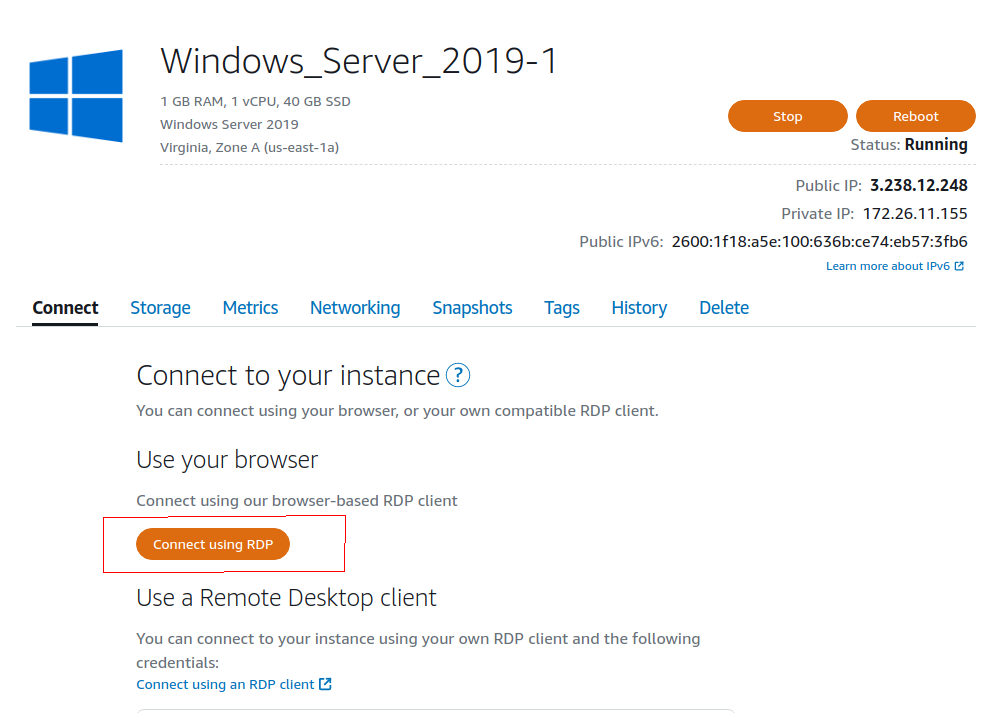
Step #2- Access to Windows via RDP
Remote Desktop Protocol (RDP) is a proprietary protocol developed by Microsoft which provides a user with a graphical interface to connect to another computer over a network connection. The user employs RDP client software for this purpose, while the other computer must run RDP server software.
Microsoft currently refers to their official RDP client software as Remote Desktop Connection, formerly "Terminal Services Client".
Inside Amazon Lightsail you can see a button that you can use to launch and RDP Client without any other installation requirements, so let’s click on the button called “Connect using RDP”
Then you’ll be prompted with a window like this one:
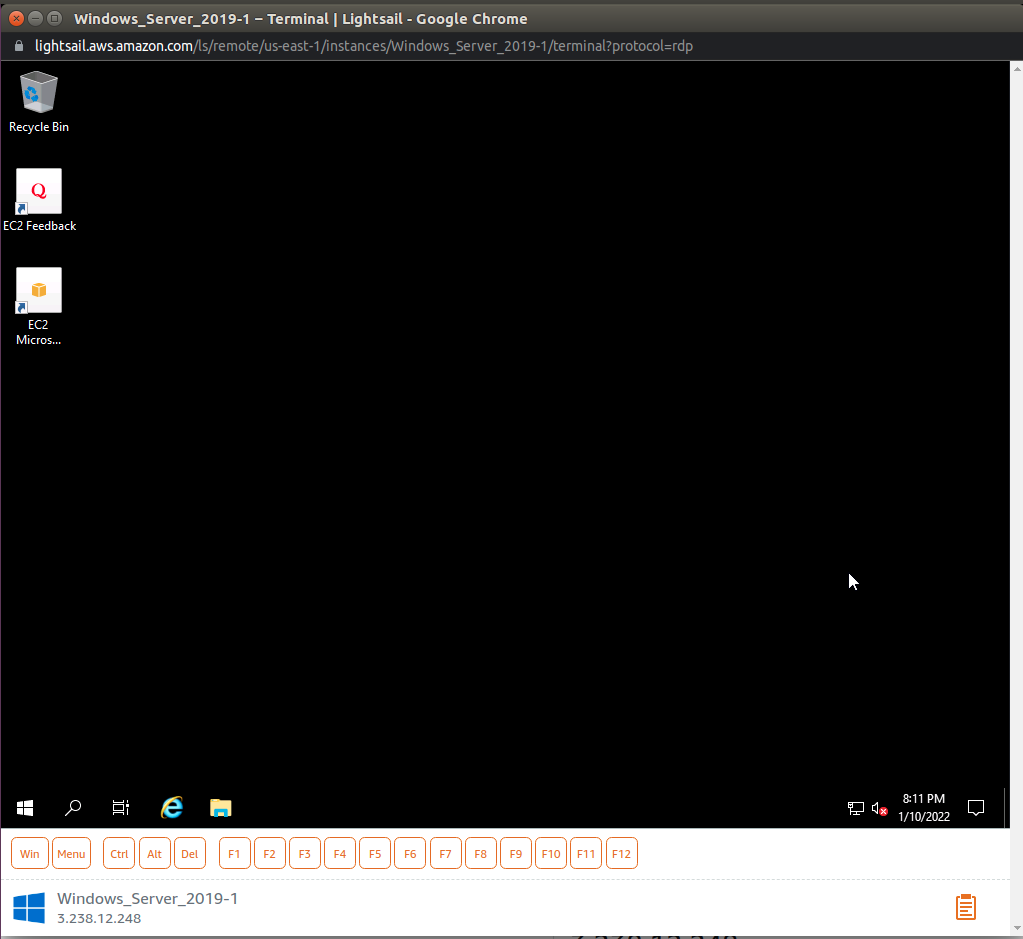
This means that you’re now on a Windows Machine
Step #3- Installing Ruby via RubyInstaller for Windows
As we learned in the blog post called: Differences Between RVM, Rbenv and RubyInstaller, RubyInstaller is the easiest and most widely-used Ruby environment on Windows. And Ruby is a great language for beginners as well as professionals. It’s suitable for small scripts as well as for large applications.
RubyInstaller combines the possibilities of native Windows programs with the rich UNIX toolset of MSYS2 and the large repository of MINGW libraries. RubyInstaller is a great way to use Ruby for development and production, especially if you just want to use Ruby for day-to-day scripting or require access to Windows resources such as hardware devices, DLLs, OLE, graphical user interfaces or the GPU.
The official webpage of the installer is: https://rubyinstaller.org/ and what we need now is to go to the next link: https://rubyinstaller.org/downloads/archives/
Note: we have to do this inside the Windows instance and you’ll be asking multiple times about security in Windows. Just disallow that alerts

First thing you can see is that there are a lot of different versions and links to download, so at the very beginning it is confusing to know which one is the right one to download. Let's clarify first the different sections of this download page:
- Ruby+Devkit Installers
- RubyInstallers
- Archives
- Documentation
- Devkits
Ruby gems can roughly be divided into two types. Gems that during installation do not require external tools and those that require them. First type of gems are either completely written in Ruby or have pre-built binaries for a system they are installed on. Second type of gems are written in C/C++ and require build tools capable of compiling C/C++ source and creating shared libraries. No matter if you use Linux, OS X or Windows operating system you must have build tools in order to install such gems.
One of the goals of the RubyInstaller project was to make it possible to install gems written in C/C++ on Windows. Solution was named DevKit. It is a set of MSYS and MinGW based build tools that make it easy and simple to build native C/C++ Ruby extensions. For Ruby 2.2 DevKit is based on the 32 bit MinGW 4.7.2 compiler suite for Windows.
According to this, what we have to look for is for Ruby+Devkit Installers with the version we want to install, because if we use the RubyInstallers we will probably find problems installing other gems and packages. So inside the Windows machine we’re going to choose
- Ruby+Devkit 2.6.8-1(x64)
We’ll be promoted with a security alert, just disallow it following this tutorial: https://answers.microsoft.com/en-us/ie/forum/all/error-message-your-current-security-settings-do/59cc236d-7baf-4552-92ff-b34b9a6942aa

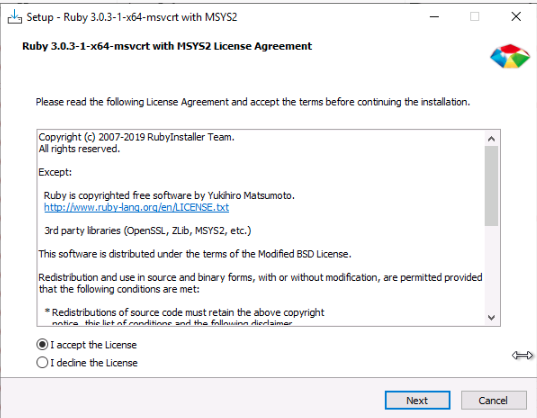
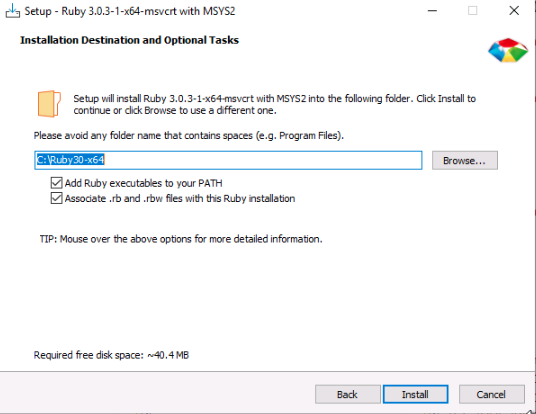
Now just follow the normal Installation process for Windows systems
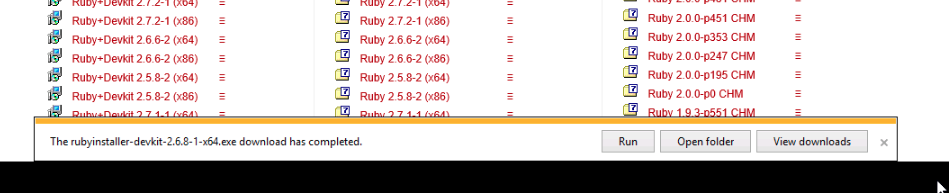
Once downloaded click on Run button
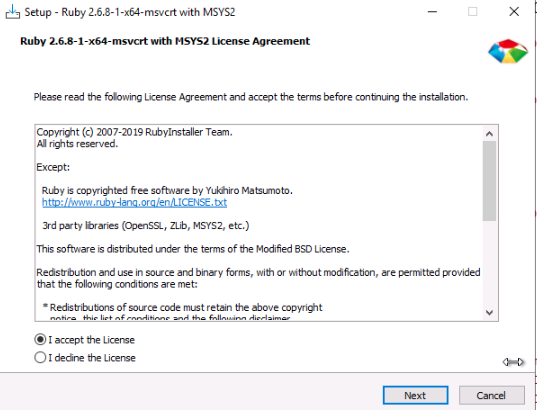
Accept the licence
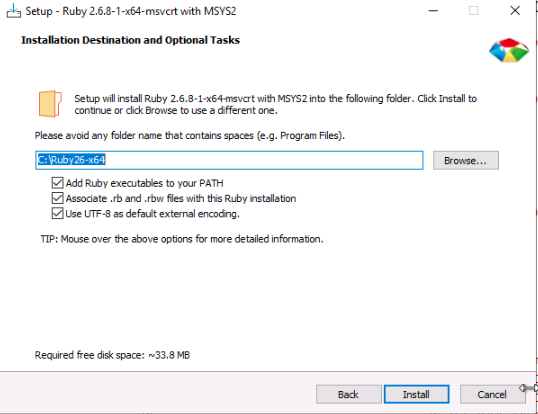
Click install button
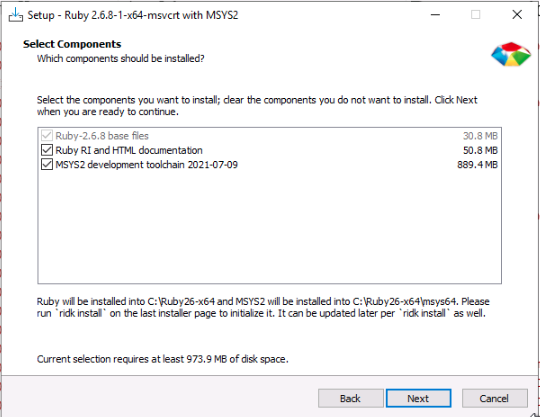
Click Next button
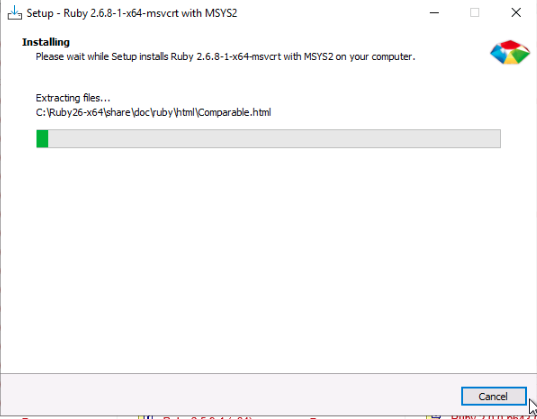
Wait for the installation
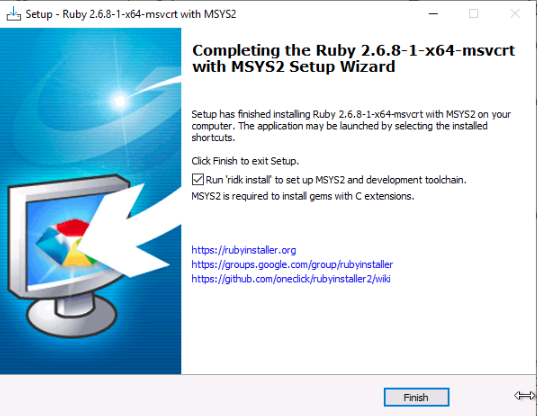
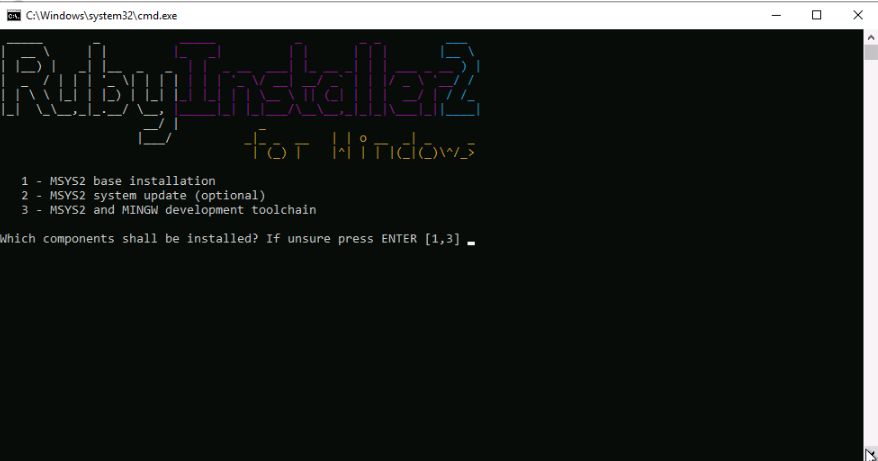
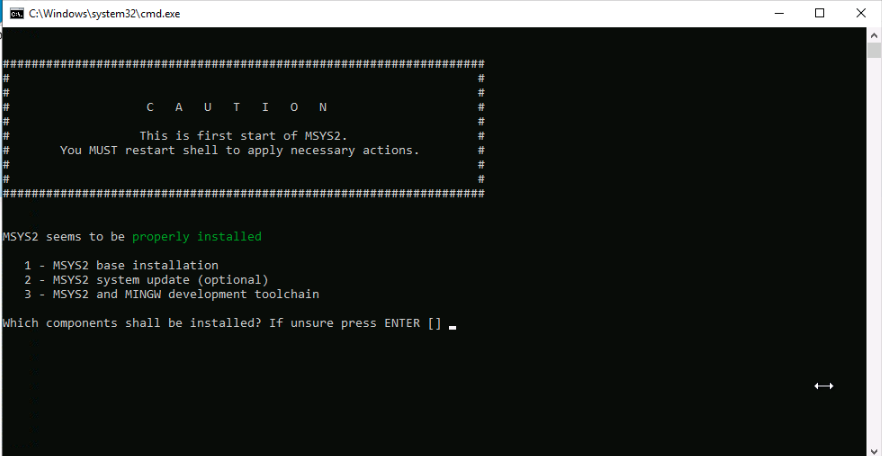
If you can see in this very last window, there is a checkbox clicked with the option: “Run ‘ridk install’ to set up MSYS2 and development toolchain. MSYS2 is required to install gems with C extensions” So, we have to install it and once you click Finish a new console terminal will be launched with next options
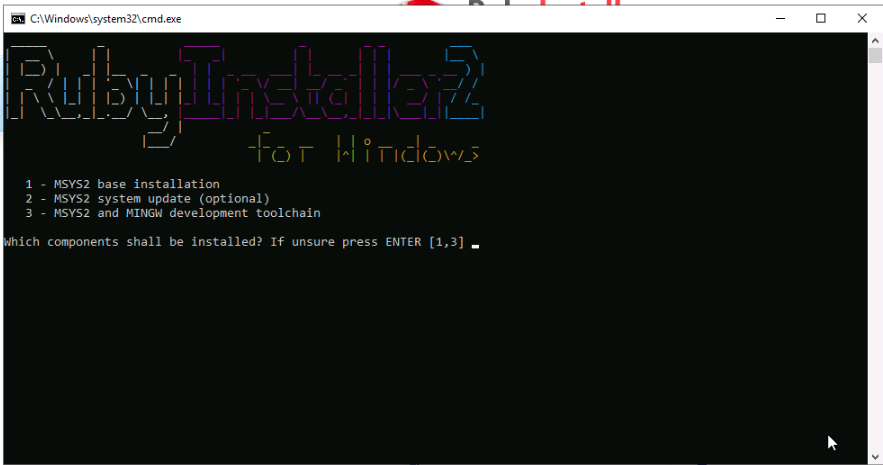
Type 1 and enter, you’ll probably see some errors given by permissions, just let it go ahead and finally you’ll be prompted with a successful installation
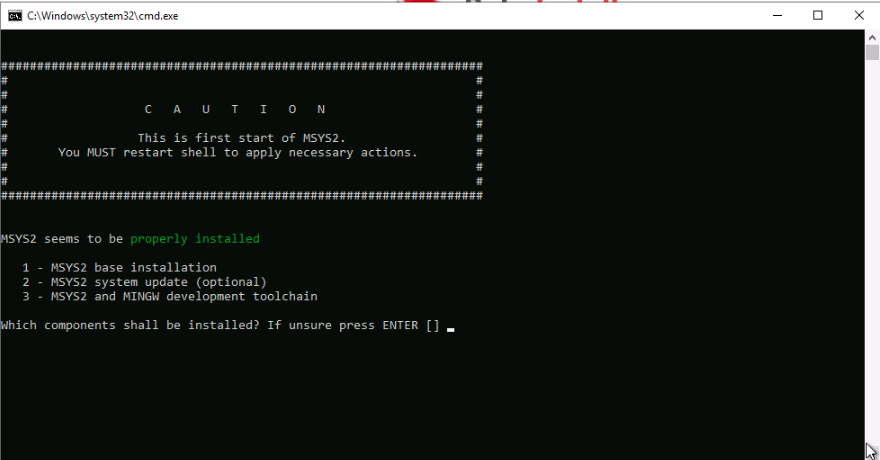
Now you can close securely this window, because is asking again the same questions and we have already installed Ruby on our machine
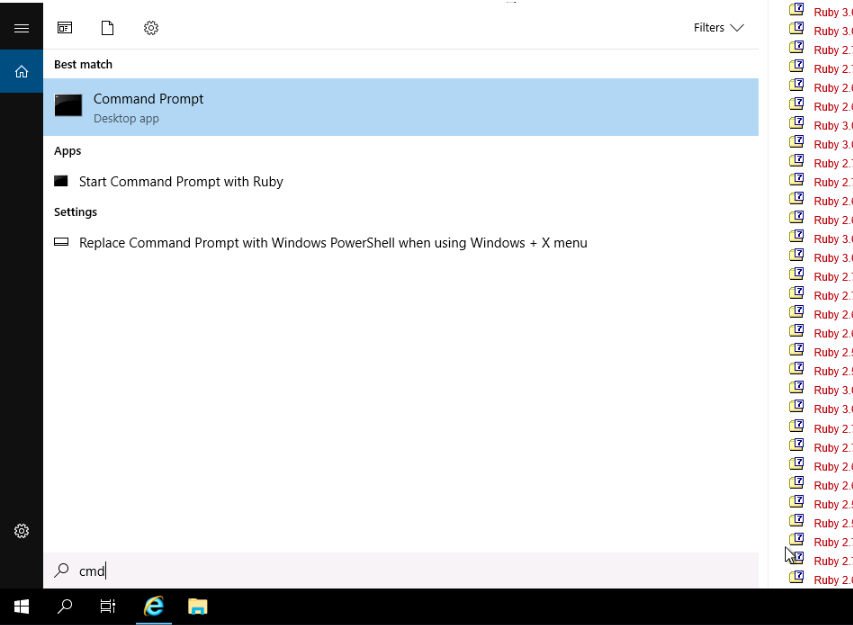
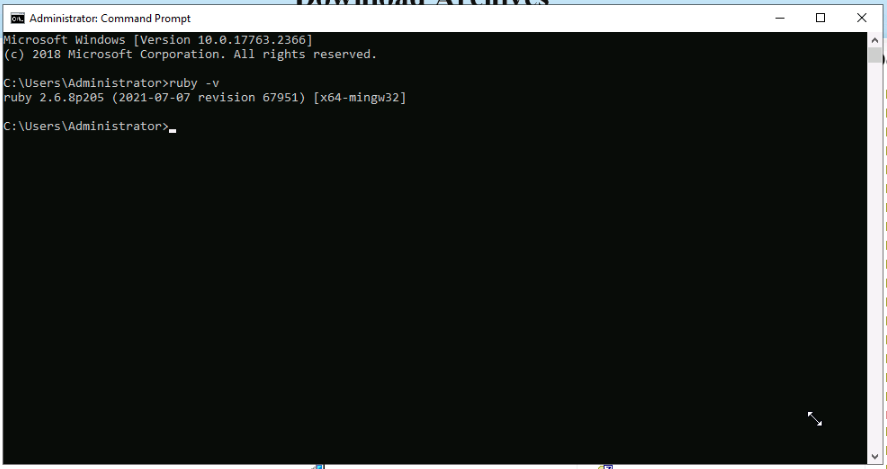
Step #4- Check the Installation
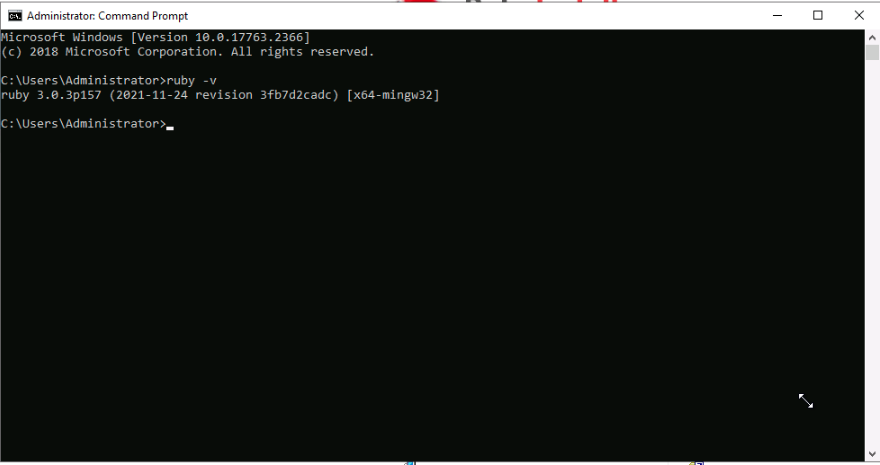
Now we have to go to the Windows Command Line typing CDM in the search bar
Once we’re there we can type
$ ruby -v
And the we can see the version we’ve just installed
Same thing if we execute irb with 1+1 and the famous “Hello World”

Step #5- Having Multiple Ruby Versions in Windows
Here is where we can find some difficulties when we want to use different versions of Ruby, because the we have Ruby globally installed with just one version 2.6.8, so if we have other project with a different version we have to do the installation process again, downloading the Ruby+Devkit with the version we want, and we can encounter versions problems between them… let make the test and see if everything works right
Now lets install the last stable version of Ruby than could not be compatible with our current Ruby version
- Ruby+Devkit 3.0.3-1(x64)

Click on Run again and repeat the process


Type 1 again, just in case
Now let’s close this terminal and open it with CMD again
What we can see now is that Windows just takes one version, the last version installed, so how can we create different projects with different Ruby versions in Windows? This can be another blog post, for now we’re leaving this one here
I hope you enjoyed the lecture
Thanks for reading
DanielM